Tuesday, December 1, 2015

[Java] Clone Object trong Java

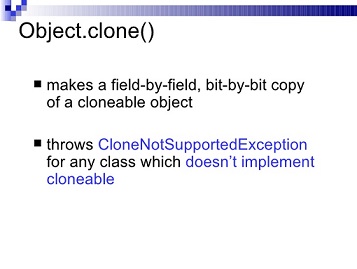
Trong nhiều trường hợp ta muốn clone object ra một object tương ứng để giúp chúng ta thao tác trên object mà không làm ảnh hưởng đến object gốc.

Trong java việc này ra đơn giản. Để clone một object ta implement Cloneable như trong ví dụ sau.
public class Employee implements Cloneable {
private String EmployeeID;
private String FullName;
public Employee() {
}
public String getEmployeeID() {
return EmployeeID;
}
public void setEmployeeID(String employeeID) {
EmployeeID = employeeID;
}
public String getFullName() {
return FullName;
}
public void setFullName(String fullName) {
FullName = fullName;
}
@Override
protected Object clone() throws CloneNotSupportedException {
return super.clone();
}
}
Sử dụng như sau:
Employee employee = new Employee();
employee.setFullName("Đức");
try {
Employee employeeClone = (Employee) employee.clone();
employeeClone.setFullName("Đức cloned");
employee.getFullName(); // trả về Đức
employeeClone.getFullName(); // trả về Đức cloned
} catch (CloneNotSupportedException e) {
e.printStackTrace();
}
OK vậy ta đã tạo được object clone. Nhưng với các object phức tạo như chứa các list con, trong list con lại còn list con bé hơn nữa. Với các object phức tạp như thế này thì đòi hỏi các object con phải implements Cloneable và for để tạo ra các object clone. Sử dụng cách này rất mất công và tốn time (chưa xét hiệu năng).
Và cách mà em đưa ra là tận dụng thư viện GSon để clone object. Như ví dụ trên để tạo Object Clone em làm như sau:
Employee employee = new Employee();
employee.setFullNam
c");
Gson gson = ne
n();
String jsonObject = gson.toJson(e
ee);
Employee employeeCloned = gson.fromJson(jsonObject, Employe
ss);
employeeCloned.getFullName();
Với cách này ta sẽ được một Object cloned với toàn bộ các property một cách đơn giản và nhanh chóng.
Download thư viện gson tại https://github.com/google/gson

Monday, May 4, 2015

HƯỚNG DẪN TẠO VB SERVICE JSON:

B1:
 Tạo project như sau.

B2:
Mở file IService trong thư mục App_Code và thêm dòng
Class IService:

[ServiceContract]
public interface IService
{

[OperationContract]
    [WebInvoke(Method = "POST", ResponseFormat = WebMessageFormat.Json, RequestFormat = WebMessageFormat.Json,BodyStyle=WebMessageBodyStyle.WrappedRequest)]
MyService.Service1.Persion GetData(int value);

[OperationContract]
CompositeType GetDataUsingDataContract(CompositeType composite);

// TODO: Add your service operations here
}

// Use a data contract as illustrated in the sample below to add composite types to service operations.
[DataContract]
public class CompositeType
{
bool boolValue = true;
string stringValue = "Hello ";

[DataMember]
public bool BoolValue
{
get { return boolValue; }
set { boolValue = value; }
}

[DataMember]
public string StringValue
{
get { return stringValue; }
set { stringValue = value; }
}
}


Class Service:


namespace MyService
{
    // NOTE: You can use the "Rename" command on the "Refactor" menu to change the class name "Service1" in code, svc and config file together.
    // NOTE: In order to launch WCF Test Client for testing this service, please select Service1.svc or Service1.svc.cs at the Solution Explorer and start debugging.
    public class Service1 : IService1
    {
        public Persion GetData(int value)
        {
            return new Persion() {
            ID=5,Name=""};
        }

        public CompositeType GetDataUsingDataContract(CompositeType composite)
        {
            if (composite == null)
            {
                throw new ArgumentNullException("composite");
            }
            if (composite.BoolValue)
            {
                composite.StringValue += "Suffix";
            }
            return composite;
        }
        public class Persion {
            public int ID { get;set;}
            public String Name { get; set; }
        }
    }
}

B3:
Tiếp theo là đến mục config cho service.
<?xml version="1.0"?>
<configuration>

  <appSettings>
    <add key="aspnet:UseTaskFriendlySynchronizationContext" value="true" />
  </appSettings>
  <system.web>
    <compilation debug="true" targetFramework="4.5" />
    <httpRuntime targetFramework="4.5"/>
  </system.web>
  <system.serviceModel>
    <behaviors>
      <serviceBehaviors>
        <behavior>
          <!-- To avoid disclosing metadata information, set the values below to false before deployment -->
          <serviceMetadata httpGetEnabled="true" httpsGetEnabled="true"/>
          <!-- To receive exception details in faults for debugging purposes, set the value below to true.  Set to false before deployment to avoid disclosing exception information -->
          <serviceDebug includeExceptionDetailInFaults="false"/>
        </behavior>
      </serviceBehaviors>
      <endpointBehaviors>
        <behavior>
          <webHttp/>
        </behavior>
      </endpointBehaviors>
    </behaviors>
    <protocolMapping>
        <add binding="basicHttpsBinding" scheme="https" />
    </protocolMapping>  
    <serviceHostingEnvironment aspNetCompatibilityEnabled="true" multipleSiteBindingsEnabled="true" />
    <services>
      <service name="MyService.Service1">
        <endpoint binding="webHttpBinding" contract="MyService.IService1"></endpoint>
      </service>
    </services>
  </system.serviceModel>
  <system.webServer>
    <modules runAllManagedModulesForAllRequests="true"/>
    <!--
        To browse web app root directory during debugging, set the value below to true.
        Set to false before deployment to avoid disclosing web app folder information.
      -->
    <directoryBrowse enabled="true"/>
  </system.webServer>

</configuration>

B4:
Test Service. Cài đặt restclient cho FireFox.
Download bản cài đặt tại : https://addons.mozilla.org/vi/firefox/addon/restclient/
Bặt firefox vào mục tools -> Add-ons -> Install Add-on from file.

Kết quả sau khi test.


Monday, April 21, 2014

Introducation XML and JAXP

- XML parsers là chương trình giúp trích xuất và thao tác với dữ liệu trong một tài liệu XML.
- Lợi ích :

  1. Là một ngôn ngữ độc lập.
  2. Không phụ thuộc vào mã nguồn.
  3. Linh hoạt và phù hợp với hầu hết các ngôn ngữ.
- JAXP cung cấp một parsers để làm việc XML. Có 2 kỹ thuật phân tích dữ liệu XML là DOM và SAX:

  1. DOM: Document Object Model là một kỹ thuật tiếp cận dữ liệu theo hướng đối tượng. trong đó tất cả các thành phần của XML như thẻ, thuộc tính, text… đều được xem như là các đối tượng. Dựa vào các đối tượng này mà chúng ta có thể trích xuất thông tin, thay đổi thông tin hay truy vấn thông tin dựa vào các hàm mà đối tượng cung cấp. 
    1. Ưu điểm:
      • Dẽ dàng sử dụng và phân tích xml.
      • Có thể truy xuất ngầu nhiên.
      • Quản lí tốt dữ liệu phức tạp.
    2. Nhược điểm:
      • Việc đọc chỉ được thực hiện 1 lần tốn thời gian nhất định.
      • Tốn bộ nhớ.
  2. SAX:  Simple API for XML là một phương pháp phân tức XML theo hướng sự kiện, đọc xml từ trên xuống dưới.
    1. Ưu điểm:
      • Tốn ít bộ nhớ.
    2. Nhược điểm:
      • Không support DTD Validate.
      • Không thể truy xuất ngẫu nhiên đối tượng bởi SAX sẽ đọc dữ liệu từ trên xuống dưới.
      • Không thể thêm sữa xóa dữ liệu trong XML.
- Khi nào sử dụng DOM và SAX:
  • Sử dụng SAX cho các tài liệu lớn hoặc cần tiết kiệm bộ nhớ.
  • Khi chỉ cần lấy một nội dụng trong tập hợp các thông tin trong XML sử dụng SAX.
  • Khi cần truy xuất ngẫu nhiên và thao tác với dữ liệu.
  • SAX nhanh hơn DOM.

Thursday, March 6, 2014

Chiến Binh Quỷ - Game Android


Mô tả
- Chiến binh quỷ - hóa thân vào nhân vật và chiến đấu qua các màn chơi. Tiêu diệt quái vật toàn bộ quái vật và thu về các đồng tiền. Sử dụng chúng để mua các vật phẩm tăng hiệu ứng.
- Một trò chơi hoàn toàn miễn phí và đang trong quá trình hoàn thiện với các bản cập nhật liên tục. Với cách chơi đơn giản nhưng cũng không kém phần thách thức.
- Hy vọng các bạn chơi vui và ủng hộ.
==================================================
Feature :
✔Hoàn toàn miễn phí, không quảng cáo, không sms.
✔Hệ thống nhân vật đa dạng.
✔Hệ thống trang bị thú nuôi, cánh.
✔Hệ thống chiến đấu với boss(đang hoàn thiện sẽ ra mặt vào các bản cập nhật sau).
✔Hệ thống quà tặng thông qua giftcode : với mỗi giftcode bạn sẽ được tặng tiền và mở khóa trang bị.

Thursday, January 9, 2014

Android Studio - Thêm thư viện jar và project library với Gradle !

Hôm nay minh xin hướng dẫn các bạn setup gradle buid để import library project và library jar.

Monday, December 2, 2013

Flip 3D - LoopEntityModifier And SequenceEntityModifier

Để một Sprite có được hiệu ứng 3d bạn làm như sau :
  1. yoursprite.registerEntityModifier(new LoopEntityModifier(
  2.  new SequenceEntityModifier(new DelayModifier(0.3f),new  ScaleModifier(0.5f, 1.0f, 0f, 1.0f, 1.0f, new  IEntityModifierListener() { 
  3.       @Override 
  4.       public void onModifierStarted(
  5.           IModifier pModifier, IEntity pItem) {
  6.           } 
  7.       @Override 
  8.       public void onModifierFinished( IModifier pModifier, IEntity  pItem) {
  9.           } 
  10.  })  
  11.  , new ScaleModifier(0.5f, 0f, 1.0f, 1.0f, 1.0f),new DelayModifier(0.3f))));
Giải thích 1 chút :
 - LoopEntityModifier dùng để lặp một Modifier.
SequenceEntityModifier được dùng để thực hiện các modifier một cách liên tiếp : nó sẽ thực hiện hết modifier này đến modifier khác.