Tuesday, December 1, 2015

[Java] Clone Object trong Java

Trong nhiều trường hợp ta muốn clone object ra một object tương ứng để giúp chúng ta thao tác trên object mà không làm ảnh hưởng đến object gốc.

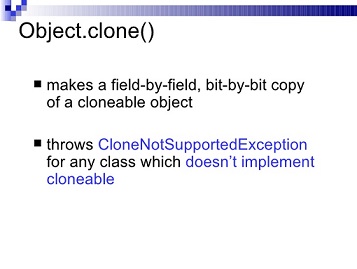
Trong java việc này ra đơn giản. Để clone một object ta implement Cloneable như trong ví dụ sau.
public class Employee implements Cloneable {
private String EmployeeID;
private String FullName;
public Employee() {
}
public String getEmployeeID() {
return EmployeeID;
}
public void setEmployeeID(String employeeID) {
EmployeeID = employeeID;
}
public String getFullName() {
return FullName;
}
public void setFullName(String fullName) {
FullName = fullName;
}
@Override
protected Object clone() throws CloneNotSupportedException {
return super.clone();
}
}
Sử dụng như sau:
Employee employee = new Employee();
employee.setFullName("Đức");
try {
Employee employeeClone = (Employee) employee.clone();
employeeClone.setFullName("Đức cloned");
employee.getFullName(); // trả về Đức
employeeClone.getFullName(); // trả về Đức cloned
} catch (CloneNotSupportedException e) {
e.printStackTrace();
}
OK vậy ta đã tạo được object clone. Nhưng với các object phức tạo như chứa các list con, trong list con lại còn list con bé hơn nữa. Với các object phức tạp như thế này thì đòi hỏi các object con phải implements Cloneable và for để tạo ra các object clone. Sử dụng cách này rất mất công và tốn time (chưa xét hiệu năng).
Và cách mà em đưa ra là tận dụng thư viện GSon để clone object. Như ví dụ trên để tạo Object Clone em làm như sau:
Employee employee = new Employee();
employee.setFullNam
c");
Gson gson = ne
n();
String jsonObject = gson.toJson(e
ee);
Employee employeeCloned = gson.fromJson(jsonObject, Employe
ss);
employeeCloned.getFullName();
Với cách này ta sẽ được một Object cloned với toàn bộ các property một cách đơn giản và nhanh chóng.
Download thư viện gson tại https://github.com/google/gson

Monday, May 4, 2015

HƯỚNG DẪN TẠO VB SERVICE JSON:

B1:
 Tạo project như sau.

B2:
Mở file IService trong thư mục App_Code và thêm dòng
Class IService:

[ServiceContract]
public interface IService
{

[OperationContract]
    [WebInvoke(Method = "POST", ResponseFormat = WebMessageFormat.Json, RequestFormat = WebMessageFormat.Json,BodyStyle=WebMessageBodyStyle.WrappedRequest)]
MyService.Service1.Persion GetData(int value);

[OperationContract]
CompositeType GetDataUsingDataContract(CompositeType composite);

// TODO: Add your service operations here
}

// Use a data contract as illustrated in the sample below to add composite types to service operations.
[DataContract]
public class CompositeType
{
bool boolValue = true;
string stringValue = "Hello ";

[DataMember]
public bool BoolValue
{
get { return boolValue; }
set { boolValue = value; }
}

[DataMember]
public string StringValue
{
get { return stringValue; }
set { stringValue = value; }
}
}


Class Service:


namespace MyService
{
    // NOTE: You can use the "Rename" command on the "Refactor" menu to change the class name "Service1" in code, svc and config file together.
    // NOTE: In order to launch WCF Test Client for testing this service, please select Service1.svc or Service1.svc.cs at the Solution Explorer and start debugging.
    public class Service1 : IService1
    {
        public Persion GetData(int value)
        {
            return new Persion() {
            ID=5,Name=""};
        }

        public CompositeType GetDataUsingDataContract(CompositeType composite)
        {
            if (composite == null)
            {
                throw new ArgumentNullException("composite");
            }
            if (composite.BoolValue)
            {
                composite.StringValue += "Suffix";
            }
            return composite;
        }
        public class Persion {
            public int ID { get;set;}
            public String Name { get; set; }
        }
    }
}

B3:
Tiếp theo là đến mục config cho service.
<?xml version="1.0"?>
<configuration>

  <appSettings>
    <add key="aspnet:UseTaskFriendlySynchronizationContext" value="true" />
  </appSettings>
  <system.web>
    <compilation debug="true" targetFramework="4.5" />
    <httpRuntime targetFramework="4.5"/>
  </system.web>
  <system.serviceModel>
    <behaviors>
      <serviceBehaviors>
        <behavior>
          <!-- To avoid disclosing metadata information, set the values below to false before deployment -->
          <serviceMetadata httpGetEnabled="true" httpsGetEnabled="true"/>
          <!-- To receive exception details in faults for debugging purposes, set the value below to true.  Set to false before deployment to avoid disclosing exception information -->
          <serviceDebug includeExceptionDetailInFaults="false"/>
        </behavior>
      </serviceBehaviors>
      <endpointBehaviors>
        <behavior>
          <webHttp/>
        </behavior>
      </endpointBehaviors>
    </behaviors>
    <protocolMapping>
        <add binding="basicHttpsBinding" scheme="https" />
    </protocolMapping>  
    <serviceHostingEnvironment aspNetCompatibilityEnabled="true" multipleSiteBindingsEnabled="true" />
    <services>
      <service name="MyService.Service1">
        <endpoint binding="webHttpBinding" contract="MyService.IService1"></endpoint>
      </service>
    </services>
  </system.serviceModel>
  <system.webServer>
    <modules runAllManagedModulesForAllRequests="true"/>
    <!--
        To browse web app root directory during debugging, set the value below to true.
        Set to false before deployment to avoid disclosing web app folder information.
      -->
    <directoryBrowse enabled="true"/>
  </system.webServer>

</configuration>

B4:
Test Service. Cài đặt restclient cho FireFox.
Download bản cài đặt tại : https://addons.mozilla.org/vi/firefox/addon/restclient/
Bặt firefox vào mục tools -> Add-ons -> Install Add-on from file.

Kết quả sau khi test.